Upgrading your laptop
How I saved money from buying a new laptop by upgrading the RAM & SSD and reinstalling Windows on my slow working Dell.
2/17/20247 min read
Troubleshooting and upgrading a slow laptop
The laptop was slow right out of the box and at the time I didn't really understand why. It had 8 GB of RAM with integrated graphics and a small 256GB M.2 SSD. Which should of been fine for my daily tasks, the computer struggled to load web browsers and copying files, it also had sound issues which made it almost unusable.
So I dug deep and researched what could be the source of those problems. I reinstalled divers from scratch and made sure they were updated to the latest version...Still no effect.
I started learning about hardware and software ,how integrated graphics differ from dedicated graphics , found out how RAM is used through out the system and how it is utilised by Windows. How proprietary Laptop drivers come with useless utilities and slow down your computer.
I found the following causes:
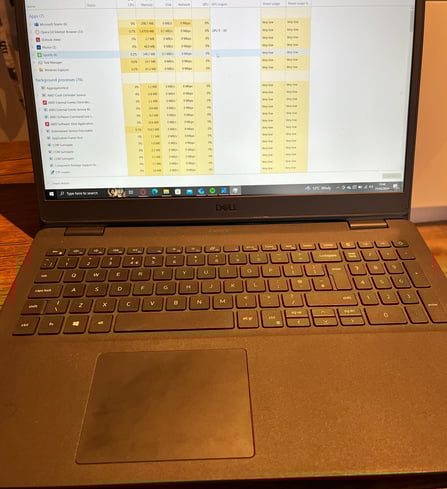
Firstly graphics that are integrated in the CPU will use system memory as it's VRAM. Therefore 8 GB of RAM left me with 5.9 GB of usable system memory which isn't really enough for modern programmes since windows takes a huge chunk out of that just for running the OS itself.
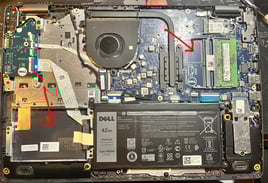
Upon taking the apart the laptop I discovered that there were empty SSD and RAM slots, which meant that this laptop is upgradable.
Windows came preinstalled with A Dell update and maintenance utility that caused more issues than it solved. It took up a lot of processing power and memory from the system and was always running in the background which couldn't be turned off.

Solutions implemented :
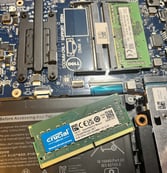
Purchased and installed relatively inexpensive SSD and RAM modules to install into the laptop


The current SATA III technology supports read and write speeds between 500 MB/s - 600Mwhich is acceptable for most tasks e.g web browsing, Gaming and office work.
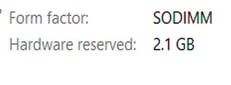
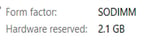
RAM modules are also relatively inexpensive, laptops primarily use the SODIMM profile of memory. (a smaller version of the traditional DIMM used in bigger PC workstations). The RAM modules don't have to be from the same company, as long its the same generation (DDR4) it can be compatible with other RAM modules. The memory controller in the motherboard will adjust the clock speed to the slowest RAM stick and should run fine.
Reinstalled Windows Home and all the necessary drivers.
-This was done to have a fresh new system without the Dell utility and driver software as that caused incorrect versions of drivers to be installed particularly with the sound and GPU.

Hardware Installation process.
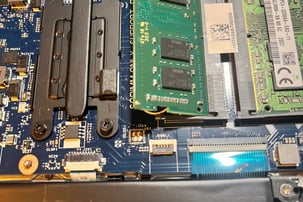
Installing the RAM module is a straight forward process, insert it a 45 degree angle and gently press it until it clicks into the slot securely.
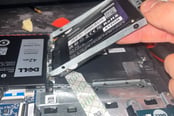
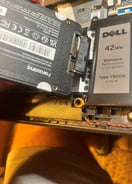
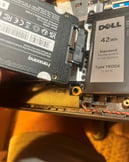
Installing the SSD is also relatively simple. To secure it in place I had to unscrew the bracket from the mother board and align the SSD into it and carefully attaching the SATA data and power connector without bending the wires excessively.
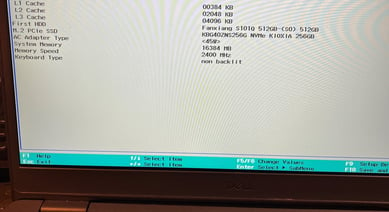
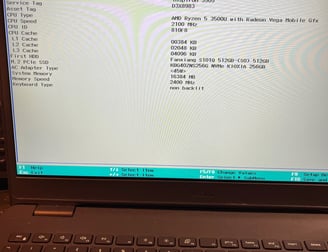
Checked the BIOS status to ensure that the hardware was installed and running correctly.
Note that the Memory clock speed is set at 2400 Mhz whereas the memory clock speed of the RAM modules is 3200. This motherboard's RAM clock is limited by the manufacturer so it sets the limit at that speed.
We can see that now we have two SSDs, one that we just installed from "Fanxiang" and one we had originally from the manufacturer labelled as "KIOXIA".
The "KIOXIA" SSD uses the PCIe3 NvMe interface to transfer and store data which provides cutting edge read and write speeds which is a lot faster compared to the traditional SATA III interface that the "Fnxiang" SSD uses. Though the NvMe SSD has only 256 GB of memory which is quite low for my daily use so I went for a cheaper SATA SSD with higher capacity
SATA III SSD will be used for the windows installation and the NvMe SSD will be used to store any other operating system that is required, so now we have dual booting capabilities for future projects.

Windows installation process
Windows installation requires the creation of a bootable USB using the "Windows media creation tool". It's a simple step by step process that Windows walks you through.
Step 1: Visit the official Microsoft website to download the Media Creation Tool for the Windows version you want to install:
For Windows 10, visit: Microsoft Windows 10 Download.
For Windows 11, visit: Microsoft Windows 11 Download.
From there, select the option labeled "Download tool now" to initiate the download process for the corresponding Windows version.
Step 2: Prepare a Bootable USB Drive
Insert a USB drive with at least 8GB of storage into your computer.
Launch the Media Creation Tool by double-clicking the downloaded file.
Accept the license terms.
Select "Create installation media (USB flash drive) for another PC" and click "Next."
Choose the desired language, edition, and architecture (32-bit, 64-bit, or both) for the Windows installation, then click "Next."
Select "USB flash drive" and click "Next."
Choose the USB drive you inserted earlier and click "Next." The tool will now download the Windows files and create a bootable USB drive. This process may take some time, depending on your internet speed and the performance of your computer.
Step 3: Boot from the USB Drive
Insert the bootable USB drive into the computer where you want to install Windows.
Restart the computer and enter the BIOS or UEFI settings.
This usually involves pressing a specific key (such as F2, F10, or DEL) during startup. Refer to your computer's documentation or search online for instructions specific to your device.Locate the boot order settings and move the USB drive to the top of the list.
Save your settings and exit the BIOS or UEFI. The computer should now boot from the USB drive.
Step 5: Complete the Setup
After the installation is complete, you will be prompted to set up your preferences and create a user account. Follow the on-screen instructions to customize your Windows experience. .
Setting up required drivers
Now that we have installed and set up windows it's time to set up some necessary drivers for different components within the laptop.
The 3 main drivers we need to install first are: Graphics, Sound and Network
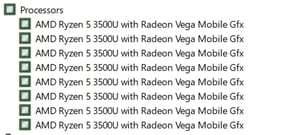
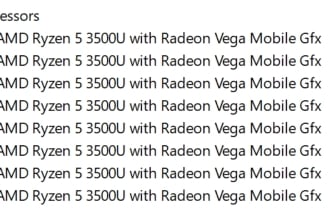
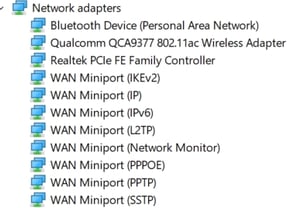
We would have to figure out exactly the models of the components inside the laptop and doing a Google search on the component drivers, this is done by simply typing "device manager" inside the windows search bar and looking for the video adapter, network adapters , processors and sound. It would look something like this:
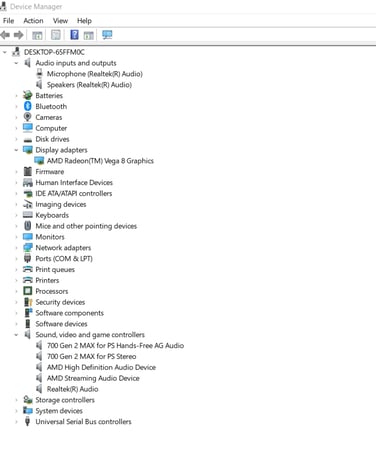
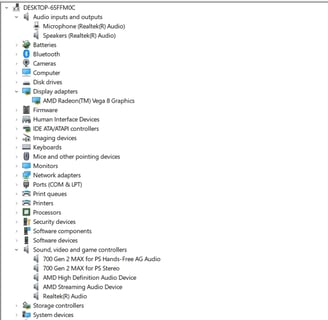
And here we can see the names of the devices and controllers

Another option on how to find the relevant drivers is to go on the laptop's manufacturers website and just use the downloads provided there. The page will prompt you to download the maintenance utility to mange all the drivers, I didn't download it since it takes up the processing power of the laptop.
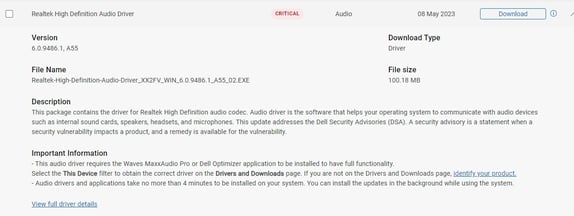
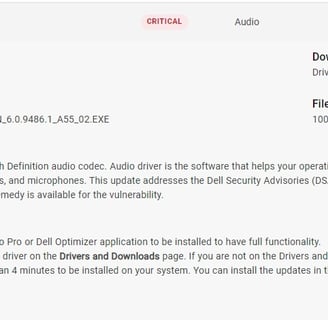
Example of the sound driver required:
There are also options to download the BIOS firmware and storage controller drivers which can be done at a later point.
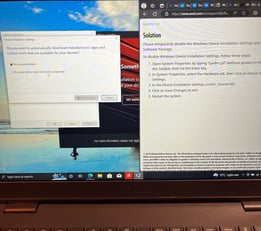
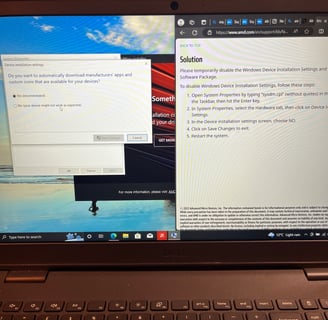
A problem occurred while I was installing the video drivers, an error message popped up saying : Error 205 - AMD Software Installation Completed Successfully but Windows Update May Have Reverted Your Driver Version During the Process
This can happen when windows doesn't agree that this software package is suitable for the system thus reverting the driver. The solution to this problem is to simply temporarily disable the Windows Device Installation Settings and reinstall the AMD Software Package.
Open System Properties by typing “sysdm.cpl” (without quotes) in the Search box on the Taskbar, then hit the Enter key.
In System Properties, select the Hardware tab, then click on Device Installation Settings.
In the Device installation settings screen, choose NO.
Click on Save Changes to exit.
Restart the system.
Once the drivers are all downloaded its a straight forward process to install them (just follow the prompts).